A Matter of Composition

An example of a beginner’s mistake.

Frame #3 – my first roll of black & white film taken with my first 35mm camera. The new found roll had been tucked away in a film canister and sat in storage for over 40 years.

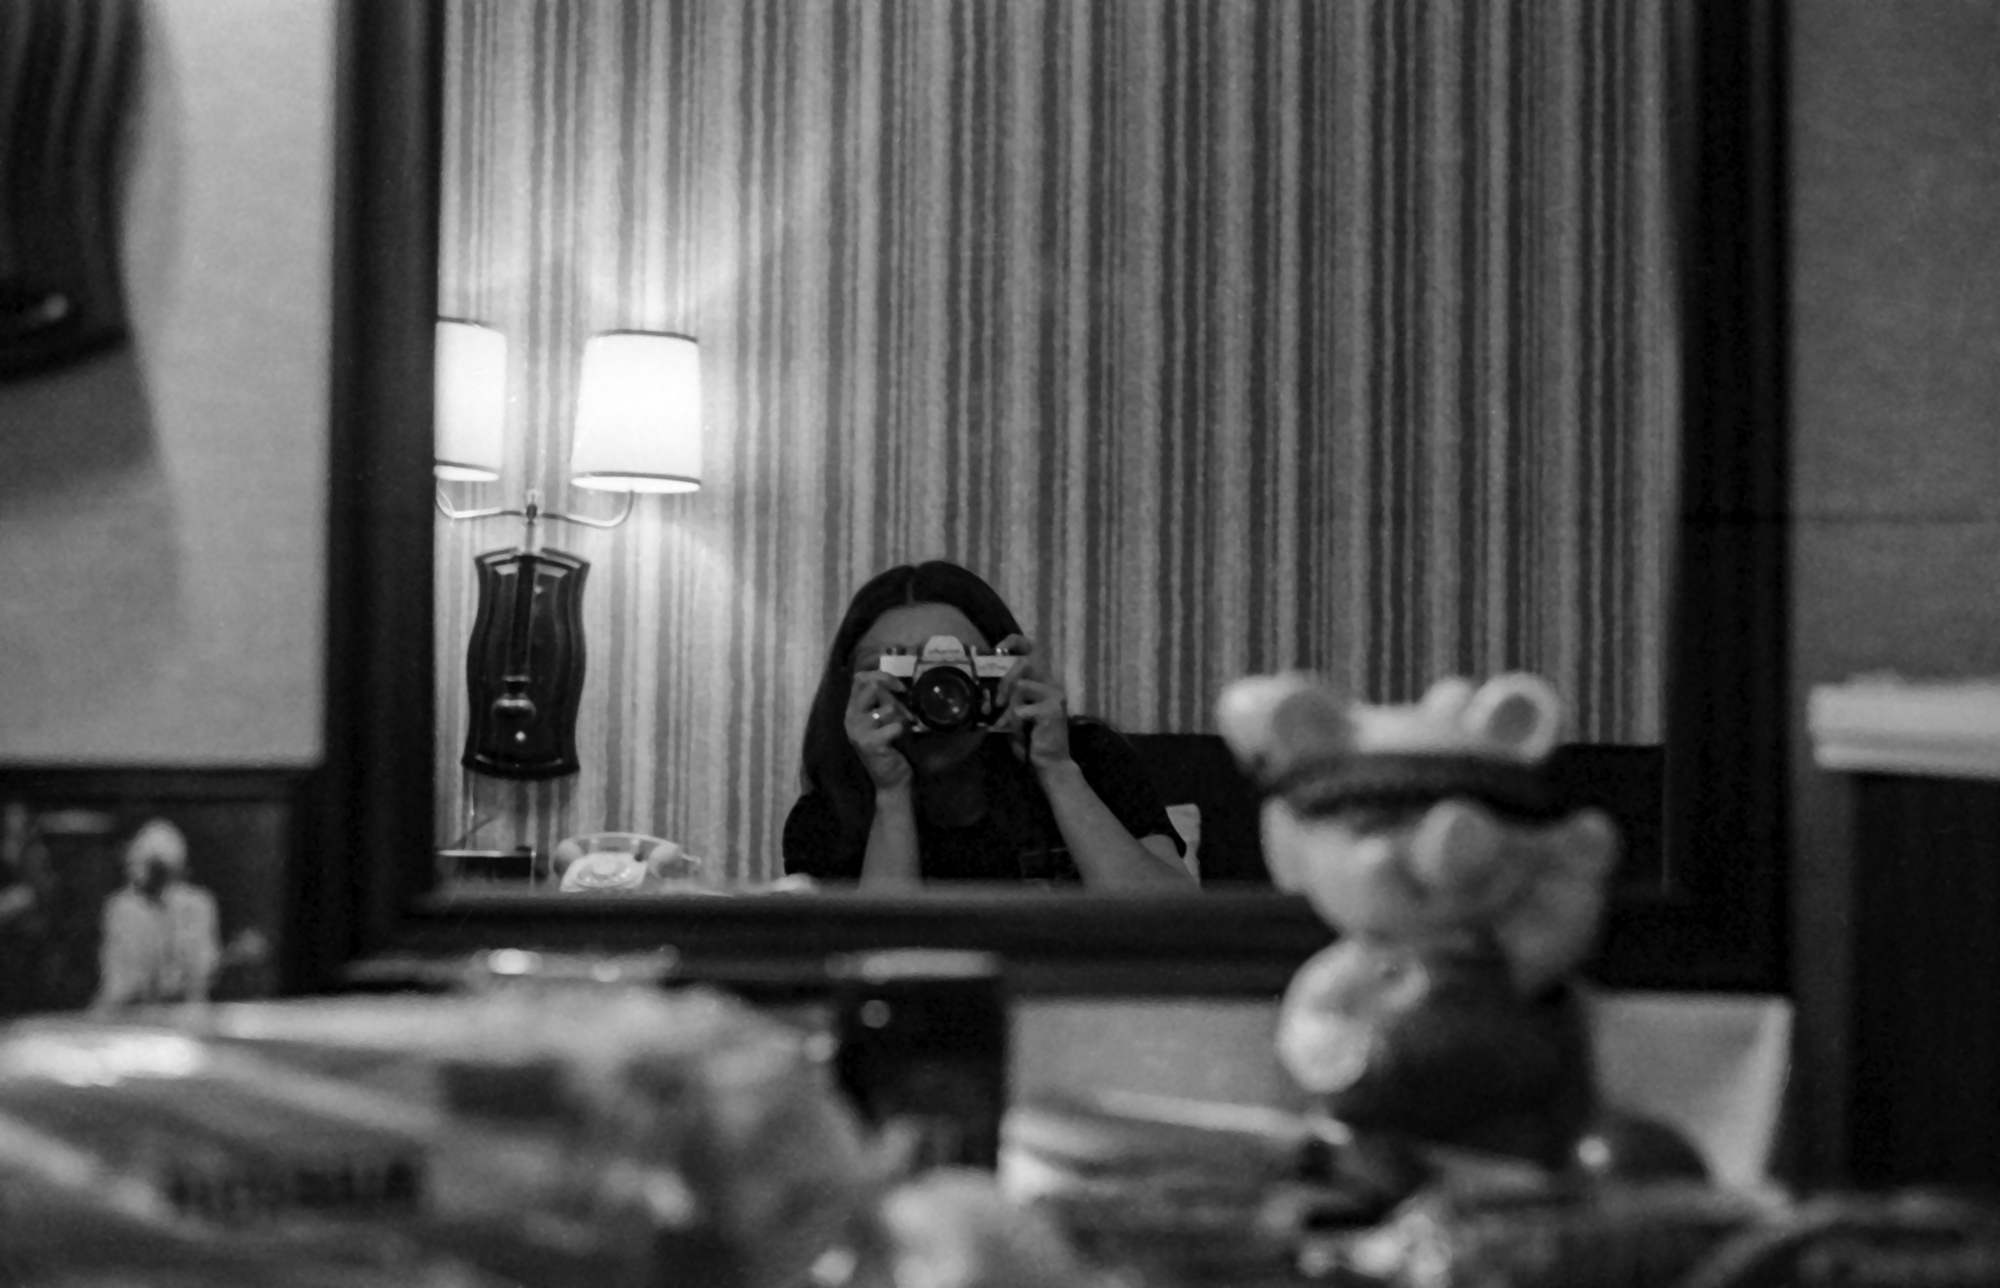
This is a photo taken with a Minolta SR-T 101 using Trix-X film. With the SR-T you have total control of choosing the aperture and shutter speed. The camera is not programmable. It does not make exposure selections for you.

The one good point about Frame #3 is its correct exposure showing details in the shadow area while the brighter areas are not overexposed or “blown out.” The photo was taken indoors in existing light (no flash) where the lighting was low even for Tri-X (ISO 400) which is considered a “fast” film made with a higher sensitivity to light. The soft focus of the foreground and extreme background indicates the aperture was set to a wider lens opening – probably f1.4 or f2.8. This narrows the area of sharp focus.

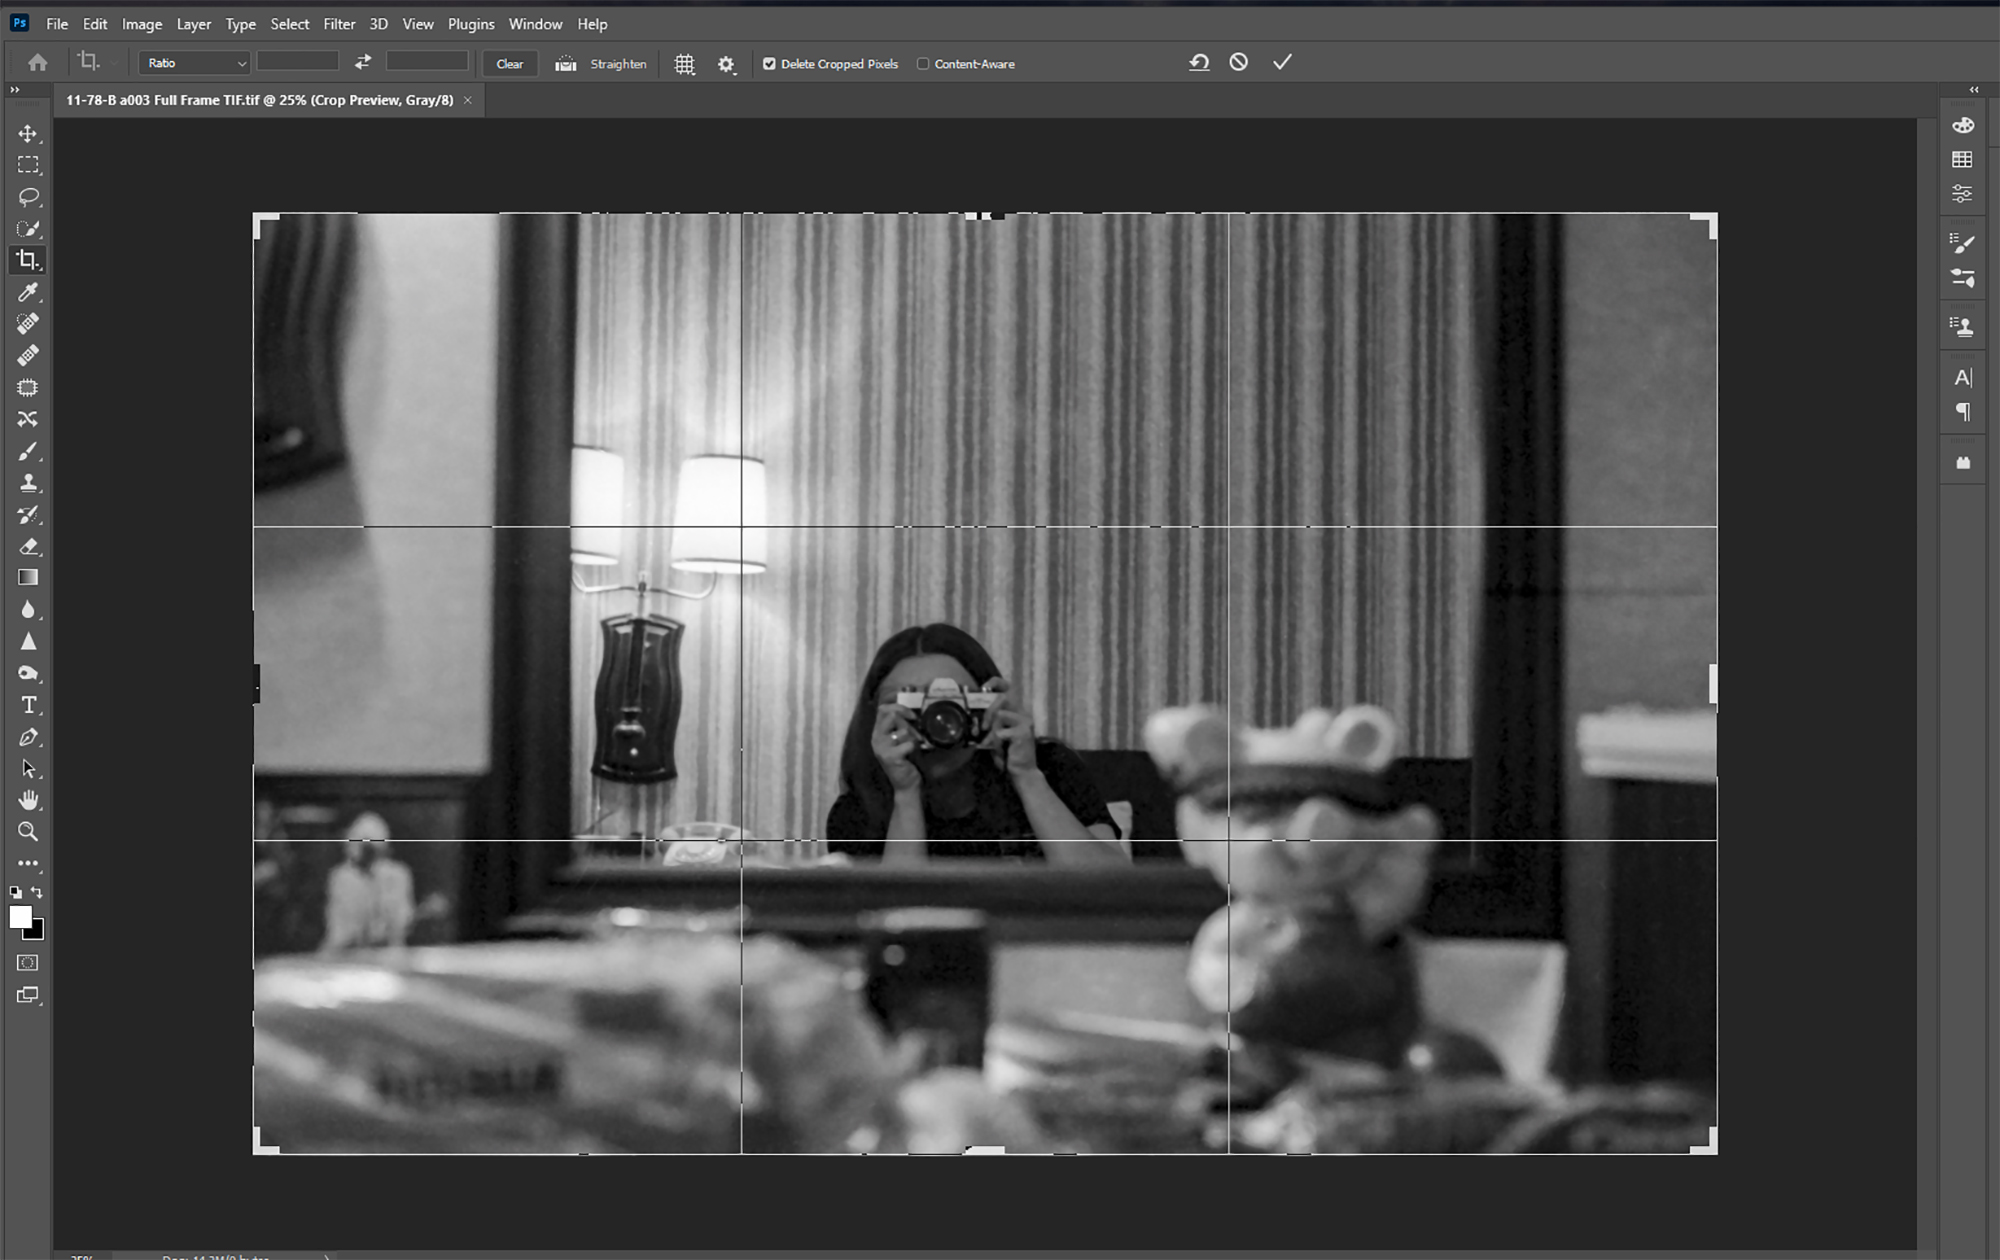
Below is an example of how aperture affects depth of field (areas of sharpness).

Even with a wider aperture allowing more light into the camera, a lower shutter speed would have been required to allow more time for a proper exposure in low light conditions. I’m guessing the shutter speed was around 1/60.

A slow shutter speed requires a tripod or a firm hold of the camera to avoid unintentional camera movement. The simple act of pressing down on the shutter button to take the picture while hand holding a camera using a slow shutter speed can cause camera shake or a blurring of the photo.

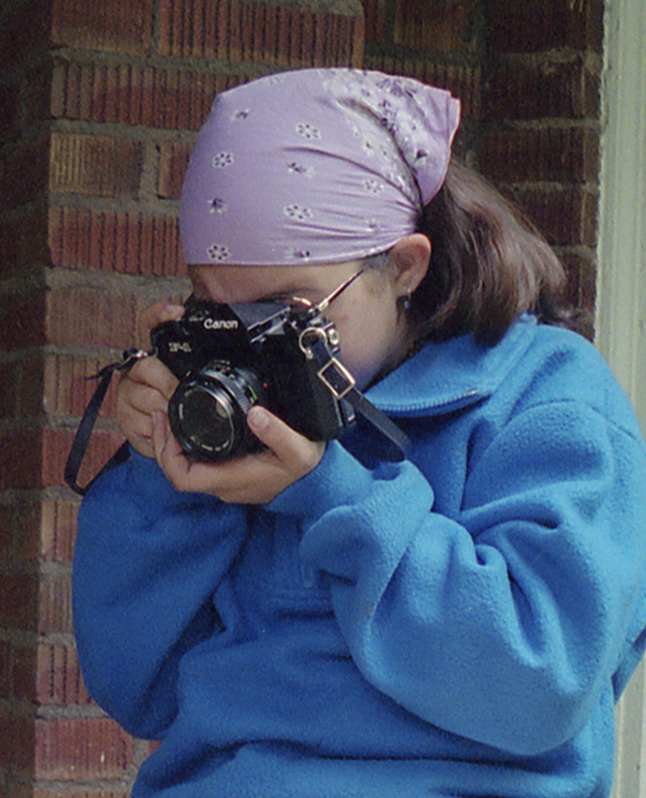
It is a common habit to hold the camera from both sides and pulled closely to the face. Here is an example of the correct way to hold the camera.

What makes Frame #3 a less than stellar photograph? The composition. The space to the left and right of the mirror doesn’t contribute to the image. The main subject is centered and the angle or perspective is too straightforward to reveal much about that subject. The foreground is cluttered with no definition and the large piggy bank to the right detracts from the main subject. The picture doesn’t fit neatly within the compositional Rule of Thirds.

This is how the picture would fit in the Rule of Thirds composition with the distracting elements removed.

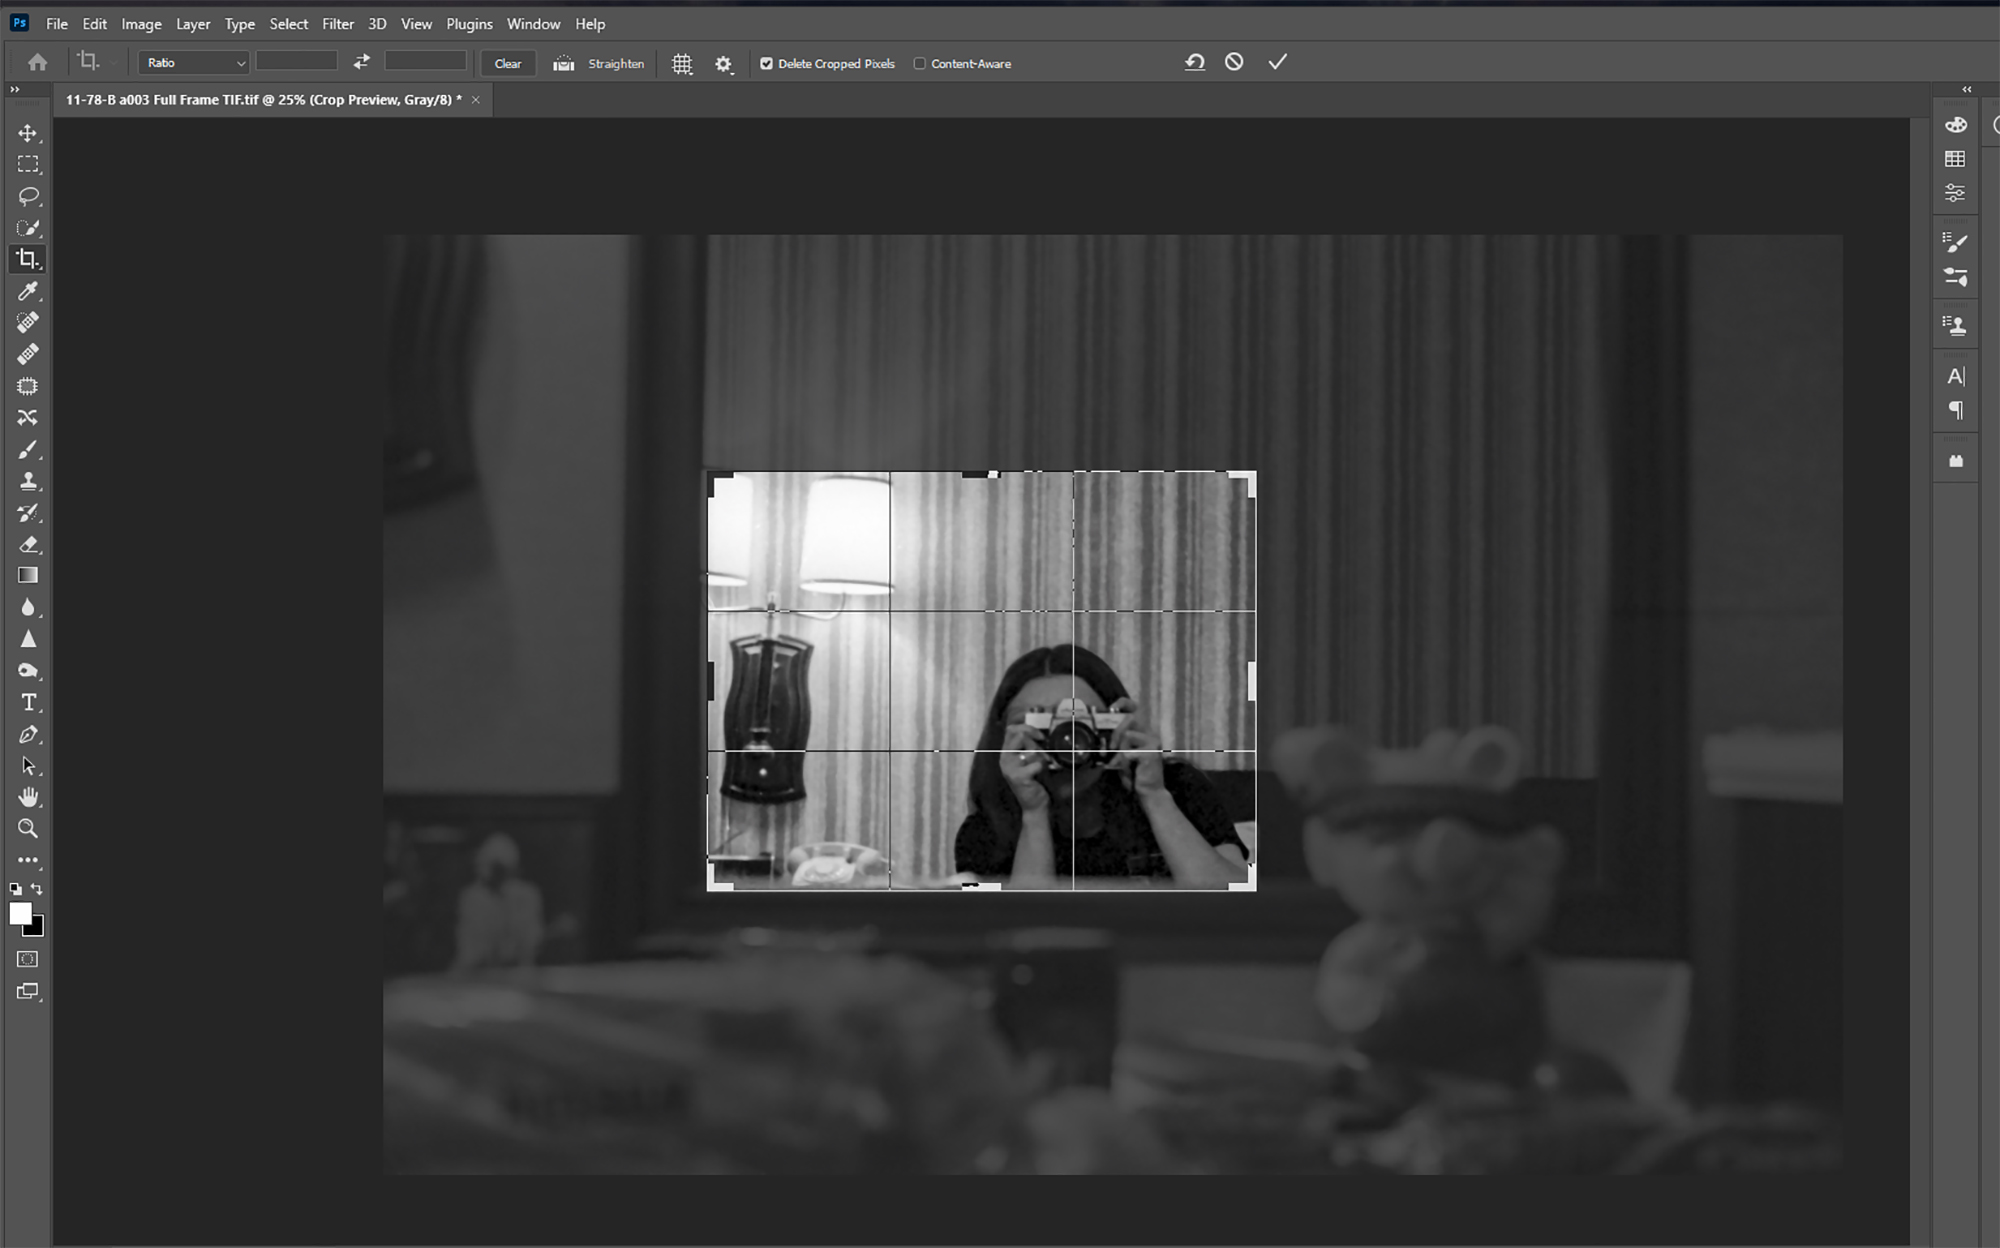
It is better to crop while composing through the viewfinder before pressing the shutter than to crop in the darkroom afterwards where the image may lose even more detail when enlarged.

The advice I would have offered to my younger self before pressing the shutter would be to take time to look through the viewfinder when composing the shot. Look for what is distracting and eliminate it from the frame by moving closer, trying a different angle or finding another perspective. Use both horizontal (landscape) and vertical (portrait) viewpoints. Be aware of the lighting. Know your equipment. Then learn from your mistakes by shooting a better roll next time.

Taking Black & White Pictures in Snow

How your film camera’s light meter can be fooled.

The light meter in your manual film camera measures everything in gray.

Shooting with black & white film in snow using the manual settings of your camera requires some exposure adjustment. A manual camera, or a camera in the “Manual” or “M” setting, means you, the photographer, select the aperture and the shutter speed when taking pictures. The light meter in your camera averages the scene and suggests what setting will give you the best exposure. But, the light meter also “sees” everything in middle gray.

If you are shooting a scene with snow and accept the the exposure reading by the camera’s meter, it may look something like this:

The light meter averaged the scene to gray which made the snow look dingy and the subjects underexposed. This negative would be difficult to print.

The solution to getting a proper exposure is to override the meter’s suggested exposure setting by increasing the amount of light coming through the lens. Basically, you are overexposing the scene to make the snow appear white and to bring out the details in the subjects.

It is recommended by film manufacturers to overexpose snowy scenes (or bright sandy beaches for that matter) by 1 stop. That means increasing (opening) the lens aperature to the next bigger opening. For example, if the camera meter reads the scene at f8, adjust your lens by turning the aperture ring to f5.6. This will double the amount of light passing through the lens.

Remember, the smaller the f stop number the larger the lens opening.

If your lens has smaller increments between full stops, known as 1/3 or 1/2 stops. You can shoot frames between f8 and f5.6. This “bracketing” of your exposures gives you several choices on which negative will yield the best exposure for printing your picture.

Ambient Light and Time of Day

Lucille’s Bed, White Earth Reservation, Mahnomen, Minnesota, November, 1987. Digital scan of a film negative (Kodak 5052 TMX).

Ambient light is somewhat uncontrollable and can be fleeting. Catching it may be a matter of preparation plus luck; of being ready while in the right place at the right time.

While touring a relative’s newly constructed home, I entered this unfinished bedroom on an overcast winter morning when the sky opened up for a few seconds. Incoming sunlight filled the room, bouncing off the wooden floor and illuminating the bed frame. I was able to squeeze off two frames before the sun disappeared behind the clouds. 

Before entering the room my camera settings were adjusted for taking pictures in a dimly lit house. The aperture was set at f5.6 (a medium lens opening) with a shutter speed of 1/60 of a second (a slightly longer exposure time). When working with black & white film the desired result is to bring out the shadow detail so I didn’t change the aperture setting for this exposure. Adjusting the aperture would have underexposed the room details.

The camera, a Canon F1, was equipped with a manual focus adjustable lens that allowed me to bring the subject into focus while looking through the viewfinder. With the bright light coming through the window, I was able to quickly focus on the headboard.

A Matter of Perspective

“It’s not so much the light but where you are in it.”

James Stanfield, National Geographic
St. Louis River from the viewpoint of the Willard Munger State Trail bridge (Carlton, MN) in November. Digital capture.

St. Louis River (Carlton, MN) in July. Digital scan of a color film negative.

Two images taken at the same location at the same time of day but in different seasons and with a change of perspective.

Welcome

As photographers we are always chasing light. It is our first step in composing a visual image and the main building block of what we do. We paint with light; the very definition of photography. Since I work with both digital and analog cameras, I will refer to a digital image as a capture and a film negative as a photograph.

This is a HDR (High Dynamic Resolution) capture of a dock on Little St. Germaine Lake in Northern Wisconsin shortly after sunrise. 
To create the HDR, I took three captures of the scene; one underexposed, one at normal exposure, and one overexposed. Using PhotoShop, a composite image was made from the three layers. This expands the detail range of shadow to highlight.